
Damper
Damper is an iconic Australian bush bread - a staple for stockmen, swagmen, drovers and indigenous Australians alike. It is similar to bannock but is traditionally cooked directly on campfire coals or in a Dutch oven. The recipe is simply water and self raising flour, but everyone seems to have their own unique spin. The recipe I followed is from Viv Moon's incredible "Outdoor Cookbook"
“Basic damper recipe
3 ⅓ cups self raising flour
Pinch of Salf
Beer (any kind)
Place flour into a mixing bowl and make a well in the centre
Add any other ingredients you wish to add. Mix in enough beer to form a soft pliable dough. This is usually more easily done with hands rather than spoons. If the mixture feels too moist, sprinkle over more flour. If too dry simple add more liquid.
Do not overwork the mixture as it will become tough
Roll into a ball shape that will fit into your camp oven. The camp oven can be lined with foil to protect the base, if desired.
Place in a moderate preheated camp oven and bake for at least 20 minutes before checking”
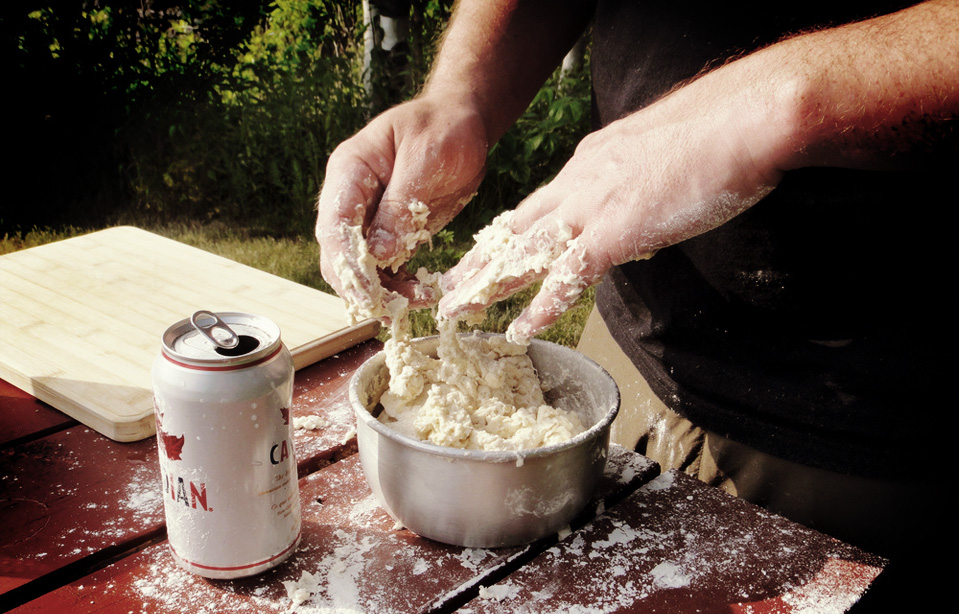
Mixing the Dough
This was very simple and very tasty, I followed Viv's recipe to the note. I used a trivet in my oven just to lift the bread a little and get the heat circulating. As ever with a Dutch oven it took a while to get the really good coals ready but it can't be rushed. I preheated the oven and dropped the dough in, checking after 20 minutes - the bread had risen nicely and giving it a tap I got the tell-tale hollow sound. I added more coals and increased the heat to try and get a little more colour and gave it another ten minutes.
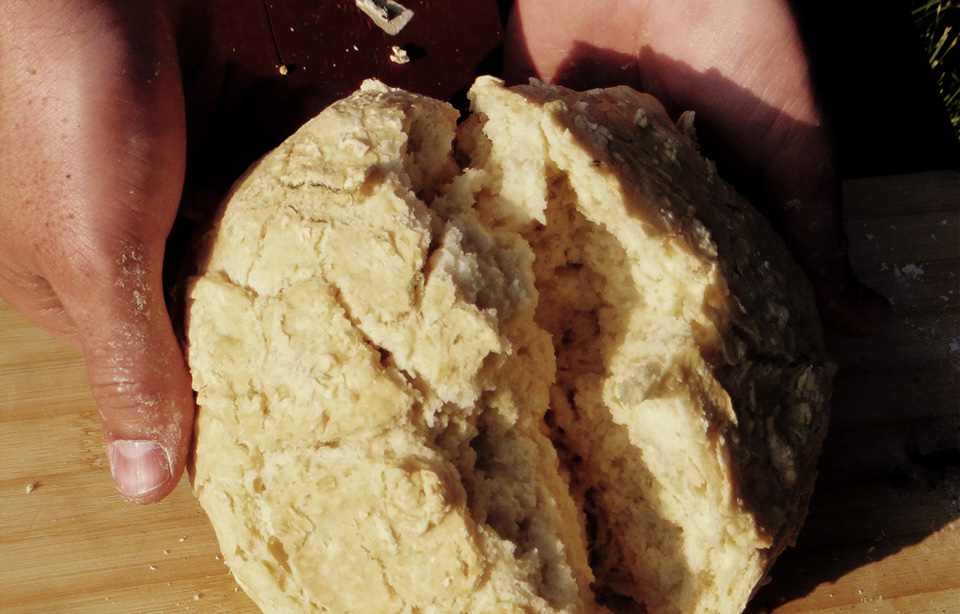
The Finished Product
The results were great. It seemed to rise more than bannock but didn't quite get the colour of the skillet bread. Taste wise it was light, fluffy and delicious. We ate it with campfire chilli and had enough left for breakfast the next day. I will definitely be making this again.
Head to head against bannock I preferred damper; although it tasted similar it was a much lighter bread. It does however take longer to cook and requires a camp oven not just a frying pan or skillet.
If any body else has tried damper or has their own spin on it I'd love to hear about it.

