Campfire Sausage Stew with Thyme Dumplings

Sausage Stew and Dumplings

Sausage Stew and Dumplings

Stew is one of my staple outdoor dishes; it's very hard to mess up and the results can be spectacular. This time however, I wanted to up the stew ante and nudge my culinary comfort zone a little further by taking on the mighty dumpling.

Ingredients

For the stew

  • 6 Really good sausages (I normally go for something herby and porky, preferably from a good butcher)
  • 2 Large white onions, roughly chopped
  • 2 Large carrots, sliced
  • 10 Small new potatoes, chopped in half
  • 1 Pint of stock (I used a couple of beef stock cubes)
  • 1 Can of cheap beer
  • 1 Bottle of expensive cider
  • Worchester sauce
  • Thyme
  • Oil for cooking (something with a high burning temperature, sunflower is fine)

For the dumplings

  • 1 Cup of self raising flour
  • 1 Egg
  • 50g Cold butter cubed
  • 1 Tbsp chopped parsley
  • 1 Tbsp chopped thyme
  • ¼ Cup of milk

Method

I cooked my stew on a campfire in a suspended Dutch oven, it needs to cook for several hours so make sure there are sufficient coals. I started with a big hot fire with slow burning wood and let it burn down. You can, of course vary the height of the oven and even cover it in coals if the heat is needed.

Sautéing and Grilling

Sautéing and Grilling

1. Lightly heat the Dutch oven and add the oil. Sauté the onions, do not let them brown - they should soften and go translucent.

2. While the onions were cooking, I put the sausages on a rack directly over the flames to seal and brown the outside. They don't need to cook through as this will happen later. I managed to tilt the grill in such a way that the oil and juices went into the Dutch oven for extra flavour.

3. Once the sausages are browned add them to the onions and pour in the stock, beer and cider. I added a good spoonful of thyme and a few good glugs of Worchester Sauce. Give it all a good stir and bring the oven to the boil, cover and simmer for 45 minutes.

4. By now the broth should be coming together nicely and slowly reducing. Add the vegetables and return the stew to the heat, give it a good stir and cover, then cook for another 30 minutes. Mix up the dumplings.

5. To make the dumplings, pour the flour into a large bowl, add the butter and rub it in until it resembles breadcrumbs.

6. Add the herbs and the egg, and mix with your hand, adding just enough milk so that the mixture comes together in a sticky dough.

7. Check the stew, it should have reduced considerably making a thick, rich gravy; if it is too dry add a little water or stock. Give it another stir and then add large spoonfuls of the dough directly onto the top of the stew. Try and place them a few centimeters apart as they will puff up as they cook. Replace the lid on and cook for another 15 minutes.

8. Check the stew. The dumplings should have puffed up and increased in size and the stew should be thick and rich. I prefer the top of my dumplings to be crispy so I buried the Dutch oven in coals and  blasted it for another five minutes.

9. Then it is done. Serve quickly and eat heartily.

Stew and Dumplings Finished and Ready to Serve

Stew and Dumplings Finished and Ready to Serve

The stew is hefty and flavorsome, the dumplings sticky, doughy and morish. Shared between two we were both stuffed and had enough for lunch the day after. I'm not sure why I was so fearful of campfire dumplings, they were foolproof and a simple way of getting a delicious and filling bread course to my stew, with little effort.
Posted on July 6, 2014 and filed under Recipe.

On the Fly

First fish of 2014 on a fly

First fish of 2014 on a fly

As far as evenings go, it looked unpromising. A thick low cloud clung to the coast, the surf was big and an abnormally high tide had pushed a mountain of water up into the river. As the tide gradually switched from slack to outgoing, the river picked up pace and began to empty back into the sea.

Having fished this river often I knew there was only a few feet of wading room before the drop-off so I gingerly edged forward into the frigid Maine waters in the evening gloom. As I began to throw my rookie double hauls into the current, I had already resigned myself to another skunked striper session.

Today, however, it happened - twice. They were far from monsters but heavy-weights in significance. My first stripers on a fly, and one I tied no less.

Posted on June 11, 2014 and filed under Fishing.

British Pathé Archive

Hiking Hints by John E. Walsh in 1933

Newsreel archive British Pathé have uploaded and made public their entire collection of 85,000 historic films. The archive features footage from around the world dating between 1896 and 1976. Obviously the first thing I searched for was hiking; oh what a wonderful collections of gems surfaced. Above we see "Hiking Hints" from 1933 by John E. Walsh he details the best gear for the 1930's British hiker.

Gear advice from John Carbeth Wells in 1932

Some sage advice from  John Carbeth Wells the "Super Hiker" who in 1932 at the age of 21 had hiked across Britain, China, Africa, Japan, Malaya and U.S.A. You can browse or search the whole Pathé Archive here.

Posted on May 2, 2014 and filed under Classic Kit, History.

Homemade Beef Jerky

 William Kemsley, Jr. - The Whole Hiker's Handbook, 1979

 William Kemsley, Jr. - The Whole Hiker's Handbook, 1979

What could be finer for a Spring day hike than a Ziploc bag full of homemade beef jerky goodness?

There are no doubt more complicated and involved ways to make it and some of the jerky connoisseurs may frown upon this method, but it was super simple, delicious and was made without a dehydrator. I found the recipe in "The Whole Hikers Handbook - The Definitive Sourcebook Featuring The Best Of Backpacker Magazine" published in 1979 by William Kemsley, Jr.

Jerky Preperation

Jerky Preperation

Jerky is very popular, though I hardly ever take it. If I do, it is not the commercially prepared type. I like the homemade variety. Here’s a recipe for it.

Beef Jerky

1 ½ lbs. beef (flank or round)
1 tsp. seasoned salt
1 tsp. onion powder
½ tsp. garlic powder
¼ tsp. pepper
½ cupWorcestershire sauce
½ cup soy sauce
Remove all fat from meat. Cut into ¼” slices along the grain. It is easier to slice if partially frozen.

Combine dry and liquid ingredient to make marinade. Marinate meat overnight in refrigerator. Drain. Lay meat strips on over rack and place foil on bottom rack to catch drippings. Leave door ajar. Set oven at 150˚F. Dry meat for 6 hours. Turn oven off and leave meat in oven for another 6 hours.

Store Jerky in covered container with holes punched in lid. Makes one pound.
— William Kemsley, Jr. - The Whole Hiker's Handbook, 1979
Finished Jerky 

Finished Jerky 

As my first foray into the world of dried meat I can claim this as a success; it was meaty and tasted of beef, not teriyaki or cracked pepper, which I liked a lot. It was a little heavy on the sodium so some fine tuning will be in order, but I'll be making it again for sure - in time for some Summer hiking perhaps. If you give it a try I'd love to hear about your results or any alternative recipes you have. Happy Spring, FINALLY!

Tea Chronicles Pt.13 – Jordanian Tea

Jordanian Tea - Dana Reserve

Jordanian Tea - Dana Reserve

Like many places in the Arab world, tea and coffee are Jordan's social lubricants of choice, and while their tea has many variants it is nearly always served strong and black in small glass tumblers, sweetened with sugar and with some kind of herb or spice for flavoring. This recipe comes from our guide, Salim, at the Dana Reserve in south-central Jordan. He was a quiet, thoughtful man who had quit the military life to pursue a career as an artist and guide. His family had lived in the area for many generations and he knew every inch of the expansive reserve - he cherished his special part of the world and was eager to share it and his knowledge of it with others from around the world.

Jordanian Tea - Dana Reserve

Jordanian Tea - Dana Reserve

Half way through our hike, Salim took us to his 'coffee shop' - a protected shelf in a mountain, overlooking a deep valley, and instructed us on the art of Jordanian tea.

Firstly the water has to be warmed over an open fire as the wood smoke adds important flavor to the tea. I'm not sure if the wood type is important but in this area there were pistachio trees; tiny, squat oak trees; and juniper trees.

The kettle he used to boil the water held about a litre and was put directly on the fire.

Once the water had begun to heat, Salim added a palmful of cinnamon bark and white sugar. Jordanians like very sweet tea, and while the sugar is an important ingredient, I don't have that much of a sweet tooth. As a compromise, Salim added about 4 tablespoons to the kettle.

Jordanian Tea - Dana Reserve

Jordanian Tea - Dana Reserve

Once the water came to a boil two teabags were added. The tea he used was called Alghazaleen Tea but Salim also said Lipton Yellow Label was acceptable.

The kettle stayed on the fire for a little longer until it came to a solid boil and was then set aside to steep for a few more minutes.

Jordanian Tea - Dana Reserve

Jordanian Tea - Dana Reserve

Salim served it in small glass tumblers and we drank it as soon as we could, the hotter the better.

Traditionally, when it comes to tea I am strictly a milk and no sugar man, but there was something magic in the marriage of these flavors; the bitter tannic tea, the rich earthy tang of the cinnamon and the sweetness of the sugar. It was unexpectedly harmonious and worked perfectly.

I  have drunk countless cups of tea in my life but this was one of the most memorable. The planets aligned with the stunning scenery, the great company and this delicious, freshly brewed elixir.

Posted on March 5, 2014 and filed under Tea.

VHD Store

The Vintage Hiking Depot Store is open

The Vintage Hiking Depot Store is open

The doors to the VHD store are open! (so to speak).

You can get your hands on the VHD t-shirt, posters and our patch and sticker bundle, and check out securely with PayPal.

Find us here

All the proceeds go towards keeping the VHD up and running.

Posted on January 12, 2014 and filed under VHD.

VHD Year in Review

Last Hike - A couple of days on the Cleveland Way

Last Hike - A couple of days on the Cleveland Way

So that was 2013. Certainly a huge year for me personally and another big year for the Vintage Hiking Depot. I became an uncle, I got married, I learned to fly fish and tie flies, started Geocaching in a big way and I stayed in a yurt. I reached my 100th post, the VHD poster collection finally came to life (I even displayed them as part of a local art walk) and through the VHD I've been introduced to many great people and learnt so much.

While I feel I've fit a lot in this year there is definitely much more to come. As far as resolutions go it's pretty much identical to every other year; get out more, read more, write more, try more new things and most of all have fun. A very happy New Year to everyone, thank you all for reading and contributing to this blog, here's to 2014.

Posted on January 1, 2014 and filed under VHD.

Friedrich Nietzsche on walking

Friedrich Nietzsche

Friedrich Nietzsche

A wonderful quote by  Friedrich Nietzsche, the German philosopher and composer. Written in 1888 and taken from "Twilight of the Idols, or, How to Philosophize with a Hammer"

Only thoughts reached by walking have value
— Friedrich Nietzsche - Twilight of the Idols, or, How to Philosophize with a Hammer, 1888

Wisdom from the wise, I couldn't agree more or have said it better.

Posted on December 3, 2013 and filed under Quote.

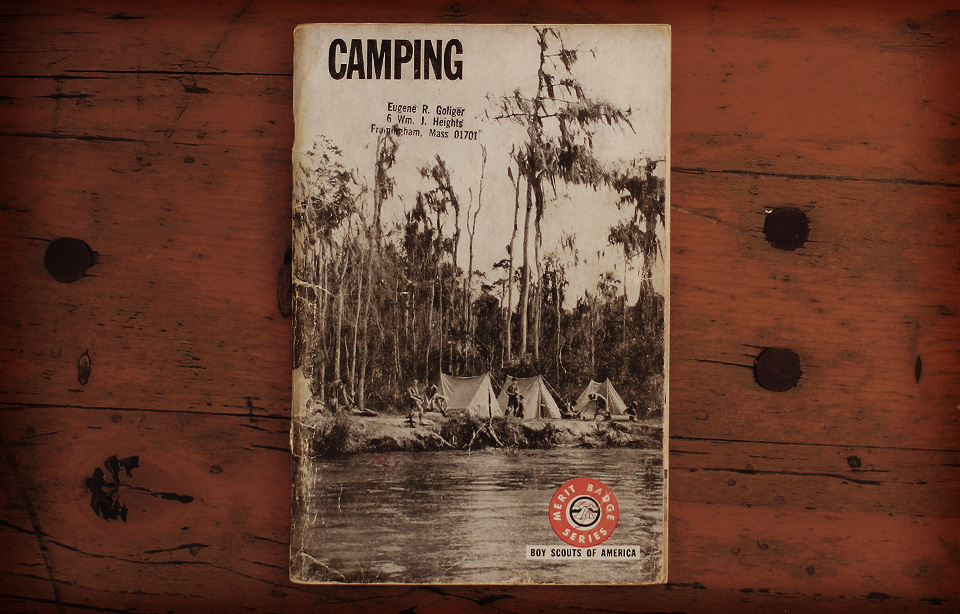
Boy Scouts of America – Camping Merit Badge Book 1966 Gear List

BSA Gear List - 1966

BSA Gear List - 1966

A vintage gear list from the Boy Scouts of America. This particular list is from the 1966 Merit Badge Book. I've had this book for a long time but as a former Scout in the UK, I disagreed with some of the BSA membership policies and it didn't feel right posting it, they have since agreed to take action and while the rule change was voted in by a pitiful margin at least they have made steps in the right direction.

WEAR Complete uniform Pr. of comfortable hiking shoes* Sweater or jacket* Pr. rubber lightweight* Raincoat or poncho* Rainhat or rainhood*

CARRY IN POCKETS Jackknife Matches in waterproof case Handkerchief Wallet and money (including dime for phone call) Individual toilet paper in plastic bag Compass 2 0r 3 Band-Aids

TOP OF THE PACK OR OUTSIDE POCKET Repair kit containing: rubber bands, needles, thread, buttons, safety pin, shoelaces, cord, extra plastic bags, fire starter Pair of extra socks Eating utensils: knife, for spoon, cup, bowl, plate Flashlight

INSIDE YOUR PACK OR FASTENED TO THE FRAME Sleeping bag or 2-3 warm blankets

INSIDE YOUR PACK Waterproof groundcloth, plastic sheet 1 pr. moccasins or sneakers Plastic or cloth clothes bag containing: extra shirt, extra pants, pajamas or sweat suit, extra handkerchief, extra socks, change of underwear Toilet kit Containing: washcloth, comb, soap in waterproof container, hand towel, bath towel, metal mirror, toothbrush and toothpaste, washbasin (plastic or canvas)

*if not warn, have readily available in pack.
— BSA, Merit Badge Series - 1966

This is a fairly comprehensive and weighty list but to be fair it is for camping not just hiking. I also love this great illustration to go along with the sections.

BSA Gear List - 1966

BSA Gear List - 1966

There is a whole series of these book covering a multitude of subjects they are cheap and easy to find but packed with great information.

Posted on November 27, 2013 and filed under Gear List.