Tips from the Archive #006

John "Lofty" Wiseman - SAS Survival Guide, 1986 

John "Lofty" Wiseman - SAS Survival Guide, 1986 

This is from one of my all time favorite books, The SAS Survival Guide by John "Lofty" Wiseman. I got my hands  on a copy when I was about 10 and read it cover to cover many times. I even made my own SAS survival kit based on Lofty's instructions. This book is full of useful stuff. Wiseman is the real deal he served with the Regiment for 26 years. He was "Sergeant Major, B Squadron (Sabre Sqn) 22 SAS, Sergeant Major 22 SAS Training Wing, Head of Operational Research 22 SAS, set up the SP Team (Counter Hi-Jack), he set up the SAS Counter-Terrorist Team and trained the first members of the US Green Berets to return to the USA to form the famous Delta Force (US Special Forces)." Like I say - the real deal. It is still in print and is easy to find.

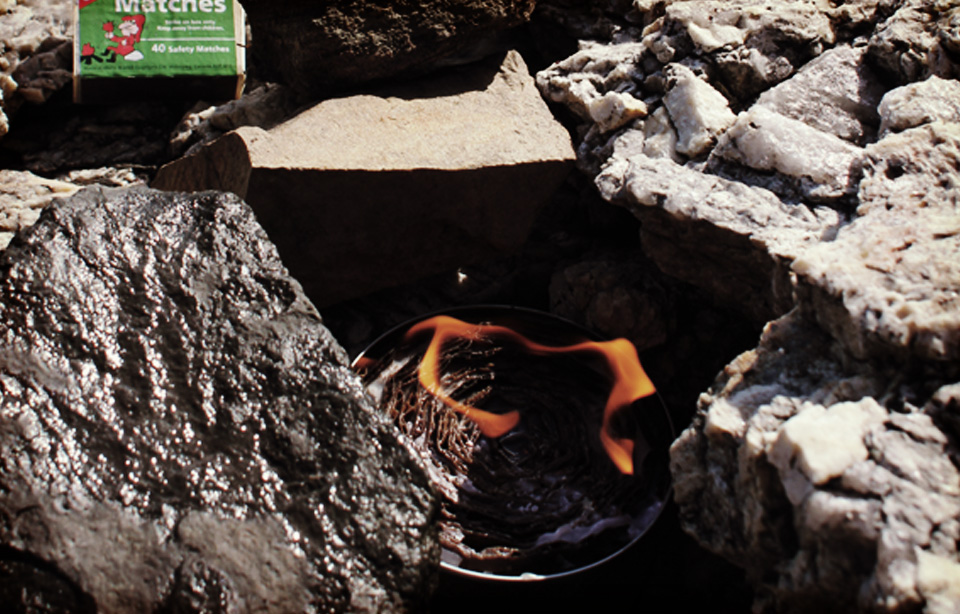
This is a great tip for dealing with wet matches.

Tip 006 – Drying a wet match.

If your hair is dry and not greasy, roll a damp match in it. Static electricity will dry out the match.
— John "Lofty" Wiseman - SAS Survival Guide, 1986
Posted on November 12, 2012 and filed under Tips from the Archive.

Buddy Burner

Buddy Burner

Buddy Burner

I haven't made a buddy burner in a long time. In-fact the last time I made one I didn't even realize it had a proper name. The principle is extremely simple, it is a paraffin wax fueled burner with a large cardboard wick. I used to make mine in an old Kiwi Shoe Polish tin but any small metal can will do. I recently picked up a copy of "Roughing It Easy" by Dian Thomas, which jogged my memory about these great burners. She has excellent instructions for making your own.

Roughing It Easy

Roughing It Easy

Thomas suggests a tuna tin, her instructions are:

Cut a long strip of corrugated cardboard (across the corrugation so that its holes show) into strips which are the same width as the height of the tuna can. Roll the cardboard and place it in the can, then pour melted wax over the cardboard. Heat the wax in a double boiler because if it is overheated, it will burst into flames. The cardboard in the buddy burner serves as a wick, and the wax serves as a candle to provide the heat for the stove. A small wick can be in the corrugated cardboard for fast and easy lighting. It is also helpful to turn the can on its side so that the flame can spread along the cardboard more easily. Filled with wax it will burn for 1½-2 hours. To lengthen the time of the buddy burners use, place a chunk of wax on top of the corrugation while it is burning.
— Dian Thomas - Roughing It Easy, 1974

Thomas also constructs a stove from an upturned number-ten can; she places the burner inside it, punches smoke holes around the top edge and a door in the side to control the burner. The bottom of the can (now the upturned top) can then be used as a cooking surface. She also advises making a damper from the lid of the can attached to a coat hanger.

Buddy Burner

Buddy Burner

I made my stove as per her tuna tin instructions and used it with a Snow Peak titanium mug. The burner lit very easily and boiled 2 cups of water in about 15 minutes. I propped the mug on rocks and used aluminium foil as a wind shield. The burner worked well and it was cheap and easy to make. I have to admit it smelt odd and it sooted my cup to all hell, if I had the choice I would probably choose an alcohol or haxamine (ezbit) stove, but for a cheap, reliable alternative the buddy burner does fine.

If you come across "Roughing It Easy" pick it up. It's not too hard to come by and there is a lot of good stuff inside.

Posted on November 4, 2012 and filed under Classic Kit.

Tea Chronicles Pt.9 – Chris Yates

Chris Yates making the perfect bankside cup of tea

Chris Yates is one of the UK's most beloved anglers, he is a prolific writer, contributing to many fishing journals as well as publishing his own books. He is a major proponent of vintage gear and old fishing methods. His love for fishing, nature and the outdoors is infectious and his calm, level manner and slightly eccentric style have made him a real fishing character.

I always loved Chris the angler, but recently I found he was a tea lover as well, this puts him in the REAL hero category for me. Shown here is a little piece he did for gofishing.co.uk about how to make the best riverside tea. He favors the Kelly Kettle an item he's championed for years. In "A Passion for Angling" it gets called out by name multiple times. He also chooses a loose leaf Ceylon blend  from Miles.

If you have not seen "A Passion for Angling" you are really missing out. For me, there is no other fishing program that capture the magic of fishing so vividly. There is no pretension or machismo it is just about the pure love of angling.

Posted on October 26, 2012 and filed under Tea.

Lt. Colonel Percival Harrison Fawcett

Lt. Colonel Percival Harrison Fawcett

Lt. Colonel Percival Harrison Fawcett

I just started reading the excellent "Lost City of Z: A Tale of Deadly Obsession in the Amazon" a book by David Grann which follows the footsteps of Lt. Colonel Percival Harrison and his search for the fabled lost city. Fawcett was a distinguished British artillery officer, an accomplished archaeologist and possibly the greatest South American explorer of all time, another truly great adventurer with a truly great family motto. His disappearance in 1925 during an expedition to find "Z" is one of the true mysteries in exploration, inspiring countless others to trace his steps, many to their own demise.

Nec Aspira Terrent. – “Difficulties be Damned”
— Fawcett Family Motto

World's Fair Knot

I have to say, they don't run contests like they used to. I just learnt about Dupont Corps' "Great Knot Search" contest. A panel of outdoor writers went through nearly 500 entries, looking for the best new, easy to tie, all-purpose fishing knot. They settled on Gary L. Martin of Lafayette, Indiana's design. Martin named the knot after the 1982 Knoxsville Worlds Fair where he unveiled and demonstrated it to the world for the first time.

How to tie a Worlds Fair Knot

Here's how its done. A clip from the always excellent Video Fishing Knots. I absolutely love this, I wonder if I've got enough pull to launch a "best new knot" contest. I doubt it.

Posted on October 13, 2012 and filed under History.

Tips from the Archive #005

Tree Bark to Find North

Tree Bark to Find North

A good tip from Berndt Berglund's "Wilderness Survival."  There are hundreds of ways of finding north but this is the first I'd heard of this method.

Tip 005 – Using a tree stump to find north.

If you find a stump, it’s easy to tell north by looking at the annual growth rings. Annual rings are formed by living cells just inside the bark of a tree. These cells serve as a transportation system from the roots to all parts of the tree. To protect this delicate system, the tree protects the cells from the cooler northerly winds by growing a thicker layer of bark on north and north-east sides of the tree. These facts have been known by woodsmen in many parts of the world. A recent study by one of our leading universities proved this fact beyond doubt.
— Berndt Burgland - Wilderness Survival, 1947

This book was intended as a guide to North America so I'm not sure this counts for the rest of the world, but it's still interesting.

Posted on October 8, 2012 and filed under Tips from the Archive.

The Hiker's Bible 1973 Gear List

The Hiker's Bible by Robert Elman 1974

The Hiker's Bible by Robert Elman 1974

This great book by Robert Elman contains a few different lists for different occasions. Lots for 'him and her' and 'how to divide up equipment.' The most concise and relevant for here is one Elman has sourced from a Sears Hillary catalogue for "longer backpacking trips."

Pack and frame 4 lbs. Down sleeping bag 4 lbs. Nylon tent 7 lbs. 8oz . Canteen 1 lb. Stuff bag 6 oz. Short foam pad 1 lb. 4 oz. 1 compass 4 oz. Knife 8 oz. Flashlight 8 oz. Nylon cord (40’) 6 oz. Maps 6 oz. First-aid kit 6 oz. Cooking grill 1 lb. 8 oz. Mess kit 1 lb. 3 oz. Fork-and-spoon kit 6 oz. Can opener 1 oz. Dishcloth 2 oz. Plastic bags 2 oz. Nylon poncho 1 lb. Extra set of underwear 12 oz. 2 extra pairs of lightweight socks 4 oz. 2 extra pairs of heavy socks 8 oz. Toilet kit (including towel, soap shaving equipment, insect repellent, mirror, toilet tissue, etc) 1 lb. 12 oz.

Total weight 28 lb. 2 oz.

If you were to add a one-pound trail ax, a stove weighing about 1¼ pounds, a nylon tent fly, a set of thermal underwear, a jacket and even a pair of walking shorts, the burden would still only come to 35 pounds, and eight pounds of food would bring it to 43. That’s going reasonably light without roughing it.
— Robert Elman - The Hiker's Bible, 1974

Nice list, although I'm not sure 43 pounds would still be classed as "reasonably light."

Posted on October 1, 2012 and filed under Gear List.

Belstaff Dalesman

Belstaff Dalesman

Belstaff Dalesman

After several years of looking I have finally found a Belstaff Dalesman. This is quite a sentimental piece for me; it was the top my father used to wear when I was growing up and is one of my favorite pieces of vintage outdoor gear. The Dalesman is a smock style, pullover jacket made of super heavyweight cotton; it has an awesome colour pallet, a huge map pocket across the front and an amazing vintage vibe.

Although originally famed for their motorbike jackets (and now their filmstar leather jackets) Belstaff did make a line of outdoor gear in the 1980's. This included the Dalesman, the Derwent and  Sir Chris Bonnington's signature jacket. I have found scant information about the Belstaff outdoor range and have tried to get in touch with them a few times, but as yet I have not got a response. If anyone has any information about this gear I would love to get the story straight.

Ol rocking the Dalesman

Ol rocking the Dalesman

I found the jacket on eBay and probably payed far too much for it but some sometimes you just have to.

Posted on September 24, 2012 and filed under Classic Kit.

Campfire Beef Bourguignon

Campfire Gastronomy

Campfire Gastronomy

I'm often asked about campfire meals I make, I consider myself quite a freestylecook,as such I don't really write things down. I'm not qualified by any means, but I worked in kitchens throughout school and college and consider myself pretty confident in the kitchen. This is the first time I have ever consciously made notes and honed a recipe to share.

Camp Fire Beef Bourguignon

Camp Fire Beef Bourguignon

Beef bourguignon is one of my favorite slow cooked meals, I think its pretty perfect for permanent camp or cabin cookery. Simple and delicious. Something you can throw on a fire and leave. This recipe is loosely based on Larousse Gastronomique's traditional dish.

Ingredients

  • 2lbs (just under 1kg) braising beef (rump)
  • 6 Rashers of thick-cut fatty bacon
  • 3  large onions
  • 3 cups (750ml) red wine (nothing too expensive but something you would drink)
  • 2 cups (500ml) beef stock
  • 2 Garlic cloves crushed
  • Thyme
  • Parsley
  • Flour (for dusting and thickening)
  • Salt and pepper for seasoning

Method

To start you will need some decent coals so make sure you build your fire big with suitable wood and let it burn down to cooking coals. This meal is slow cooked over a few hours so be sure to have a large stock of wood so coals can be replenished.

  1. Roughly cut the beef into large chunks and dust with seasoned flour and put you dutch oven on the coals to pre-heat.
  2. Cut the bacon into large strips and fry in your dutch oven
  3. Add the beef, two of the onions sliced roughly and the garlic and brown them all
  4. Add the wine and stock , the herbs and season well
  5. Cover and gently simmer for at least two hours; until the beef is meltingly tender and the sauce has thickened. Give it a try and adjust the seasoning to your taste.
  6. Once you think it is ready slice and fry the remaining onion and add it to the pot, continue cooking for another 20 minutes
  7. Serve with camp bread (either bannock, damper or flatbread.)

The dish came out very well. Tender meat with a thick delicious sauce. It was also incredibly easy. I hope, this inspires some of you to try something new on the campfire.

Posted on September 13, 2012 and filed under Recipe.

Clyde Ormond - Clothespin Bass Plug

Homemade fishing gear

Homemade fishing gear

Is there anything more satisfying than catching a fish? How about catching a fish on a homemade lure. I've never really ventured into the world of homemade fishing gear but, as with a lot of my posts, I came across a great article in an outdoor book and had to give it a try. In Clyde Ormond's fantastic "Complete Book of Outdoor Lore" he devotes a whole chapter to makeshift lures. The most intriguing and coolest looking being the clothespin bass plug.

Clothespin Bass Plug

Clothespin Bass Plug

(1) Start with an old fashioned clothespin. (2) Flatten the top of the knob and burn a small dent at partition center with hot wire to keep hook from slipping. Tie hook between prongs with monofilament, bringing it from top and bottom and knotting it along the side. Then loop it around the neck. (3) and tie on top of plug. Burn eyes into the head. Plug should be charred along top to simulate shading, and “scales” can be added by chipping lightly with a knife blade (4).
— Clyde Ormond - Complete Book of Outdoor Lore, 1969

Ormond is one of my favorite outdoor authors, I find myself re-visiting his books time and time again. His instructions are a little vague but I managed to fashion something that looked pretty similar. I burnt the top and the eyes, tried to get as much contrast my scrapping the pin to reveal new wood. I also spent a long time fashioning the scales and did a little nimble knot work. It could be tidier but I am rather proud of it.

My Finished Clothespin Bass Plug

My Finished Clothespin Bass Plug

It swam very well, I was casting from a canoe and it bobbed along beautifully. I also trawled it behind for a time. I feel the bass where I fish in Maine are a little whiley and the further afield I get the better success I might have. It was still a real pleasure fishing with homemade gear, especially one so whacky looking. Rest assured there will be pictures if I have any success with it.

Posted on September 7, 2012 and filed under Classic Kit.